


-
-
Clean your workbench and lay out the parts and tools you will need for the cassette portion of the 12 speed upgrade install.
-
Tools: 3mm hex key which came with your kit or a torque wrench with 3mm hex bit. Also, either a chain whip or cassette lockring tool.
-
Parts: New 12 speed TRS+ Cassette, engineering bushing already installed inside the steel portion of the cassette, and small 3mm hex screw packaged separate of the cassette.
-
With the wheel off the bike and your old cassette removed from the XD™ driver, thoroughly clean and lightly grease the splines of the XD™ driver and the body.
-
Separate the cassette 1/2s and verify that the bushing is in place and the interlocking features on both the steel and alloy sections of the cassette are greased from the factory. If you ride in extremely wet or dry conditions, put a bit of extra grease on those locations using the small tube of grease that came with your kit.
-
-
-
NOTE: Special step for Hope hubs!! - If you are installing a pinch-bolt cassette on a Hope XD™ driver, you will need a special shim available free of charge from us. Please go to Step 3 BEFORE torquing the pinch bolt of the alloy section.
-
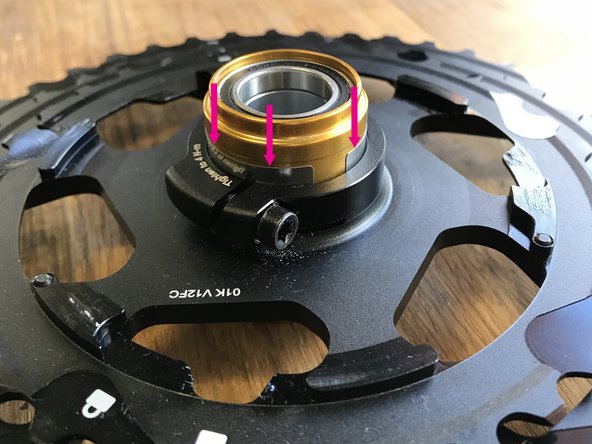
On the alloy section of your TRS Plus 12 Speed Cassette, ensure that the 3mm hex screw on the clamp is fully loosened and slide the cassette piece onto the XD™ driver.
-
Ensure that the cassette section is fully seated and that the back surface of the cassette contacts the stop surface on the XD™ driver. The fit can be tight and you may need to turn the cassette a few degrees clockwise while applying downward pressure to get the splines to line up and fully seat the cassette.
-
Using a torque wrench with a 3mm hex bit, tighten the pinch bolt on the cassette section to 3Nm. Or using the 3mm hex key snug + 270 degrees (3/4 of a turn)
-
-
-
Hope XD™ drivers do not conform to the XD™ standard and require a shim for proper pinch-bolt cassette function. This shim is available free of charge from e*thirteen and it's distributors. Contact support@bythehive.com.
-
Note the recessed location on the freehub where the cassette clamps the body. This is where the shim will go.
-
With the clamp screw completely loosened, slide the shim over the driver body and insert one shim edge in between the alloy cassette and the driver body. Then slowly work around the body pushing the shim into place until it is fully seated.
-
Using a torque wrench with a 3mm hex bit, tighten the pinch bolt to 3Nm (or snug + 270 degrees as shown in the final image of step 1.
-
-
-
Verify that the engineered plastic bushing is installed in the steel portion of the cassette. This piece is critical for the function of the cassette. The cassette will be damaged if it is not installed.
-
Align the arrow on the 33t cog of the steel portion with the unlocked logo on the 39t cog on the alloy portion. Push down firmly on the steel portion of the cassette to slide it down onto the XD™ driver. You may need to wiggle it slightly to get it to seat fully as the bushing on the steel section will create a snug fit.
-
Ensure that the steel portion is fully pressed on and the spacing between the 33t and 39t is consistent with other cassette cog spacing.
-
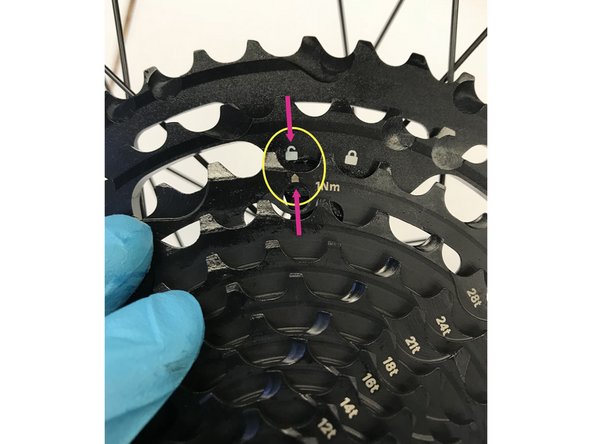
Using a cassette lockring tool or chainwhip, turn the steel portion of the cassette clockwise until the arrow moves from the unlock logo to the locked logo and the hole in the 33t lines up with the threaded hole on the 39.
-
Ensure the hole in the 33 lines up directly with the threaded hole in the 39. If it does not, re-torque the steel portion of the cassette clockwise.
-
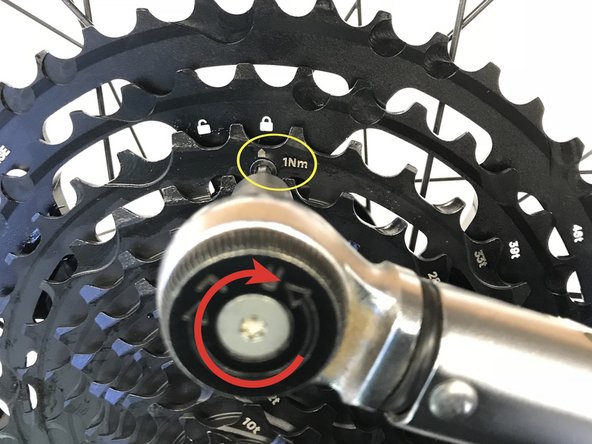
Insert the small 3mm hex screw into the hole on the 33t cog and thread into the 39t cog. Tighten to 1Nm or snug plus 30 degrees.
-
The head of the screw should be flush with the face of the 33t cog
-
-
-
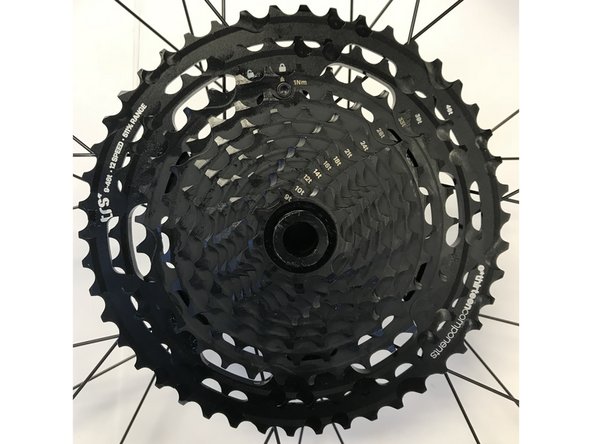
Spin the cassette to ensure it spins straight and freely. You're almost there!
-
Reinstall the rear wheel on the bike, run your new cable and housing included with the kit and adjust your rear derailleur. Here is a handy link where our friends from Park Tool will show you how to do that.
-


Thanks for reading, now get out there and ride!
SRAM™, SRAM EAGLE™, SRAM 1x™, XX1™, X01™, X1™, GX™ and NX™ are trademarks of SRAM LLC
Thanks for reading, now get out there and ride!
SRAM™, SRAM EAGLE™, SRAM 1x™, XX1™, X01™, X1™, GX™ and NX™ are trademarks of SRAM LLC