Introduction
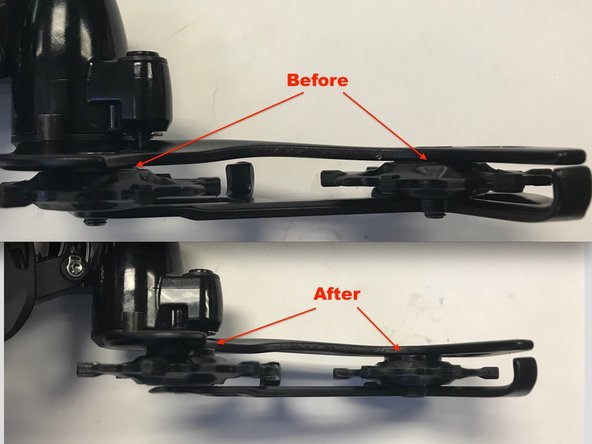
You will install a set of thicker pulley spacers in the derailleur to move the derailleur pulleys relative to the derailleur linkage, and allow the derailleur to reach the 46T sprocket on your new cassette.
-
-
Identify and set aside the derailleur pulley spacers and screws from your e*thirteen 12s Upgrade Kit.
-
Note that one screw is longer than the other. The longer screw is used in the bottom pulley and the shorter is used in the top pulley.
-
With your derailleur on the workbench, swing derailleur cage forward and lock in place using the cagelock feature. This will provide easy access to the pulley screws.
-
-
-
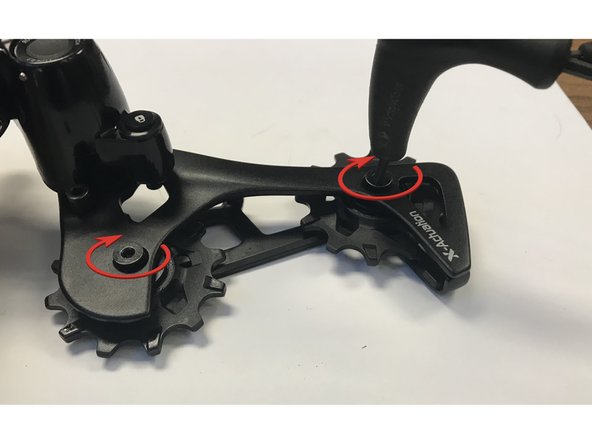
Using the 3mm hex wrench, loosen each pulley screw about 2-3 full turns. Do not fully remove the bolts on this step.
-
The pulleys are directional; and inner and outer pulley spacers are specific to each side. Take care to note the pulley position as you remove it and be sure to reinstall in the same direction. The upper pulley will have a "U" facing out and the lower pulley will have a "L" facing out.
-
Using the 3mm hex wrench, fully remove the screw for the top pulley and slide out the pulley. Discard the screw, it will not be reused.
-
Replace the outer pulley plate with the thicker version supplied in your kit and reinstall the pulley into the cage using the shorter of the 2 pulley screws provided in your kit. Do not fully tighten the screw.
-
Next, follow the same procedure for the lower pulley. Discard the old screw and use the longer of the 2 pulley screws provided in your kit to install the lower pulley.
-
-
-
Tighten the two pulley screws to 4nm, or snug + 90 degrees.
-
Spin the pulley wheels to make sure they run smoothly.
-
Verify that the upper pulley has the U facing outward (away from the rear wheel) and the lower pulley has the L facing outward.
-
Reinstall the derailleur on the bike and torque to mfg specs.
-
Thanks for reading, now get out there and ride!
SRAM™, SRAM EAGLE™, SRAM 1x™, XX1™, X01™, X1™, GX™ and NX™ are trademarks of SRAM LLC
Thanks for reading, now get out there and ride!
SRAM™, SRAM EAGLE™, SRAM 1x™, XX1™, X01™, X1™, GX™ and NX™ are trademarks of SRAM LLC


