


-
-
Clean your workbench and lay out the parts from your e*thirteen TRS+ 12s Upgrade Kit.
-
Note that all required tools for the 12s upgrade are included with the TRS+ 12s Kit. This includes the following: shifter assembly fixture (aka the claw), 2.5, 3, 4, 5mm hex keys, T25 Torx bit, SQ2 bit and 1/4" hex w/bit holder.
-
Put your bike in a work stand and perform the following steps:
-
Shift the bike into it's hardest gear. Push the derailleur cage forward and lock in place.
-
Remove the following items from the bike, clean thoroughly and set aside: 11s rear shifter, rear shifter cable and housing, rear wheel, chain and rear derailleur.
-
Remove the cassette from the rear wheel.
-
-
-
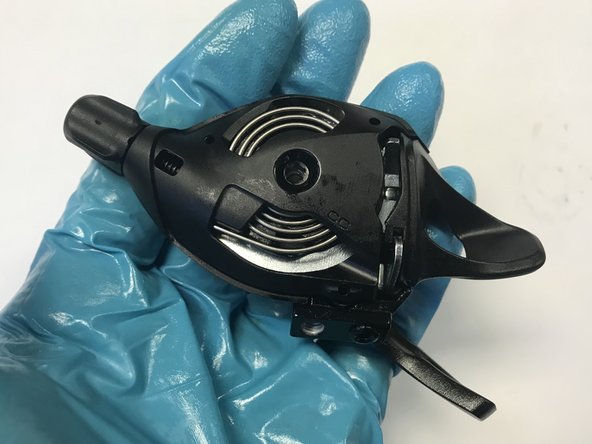
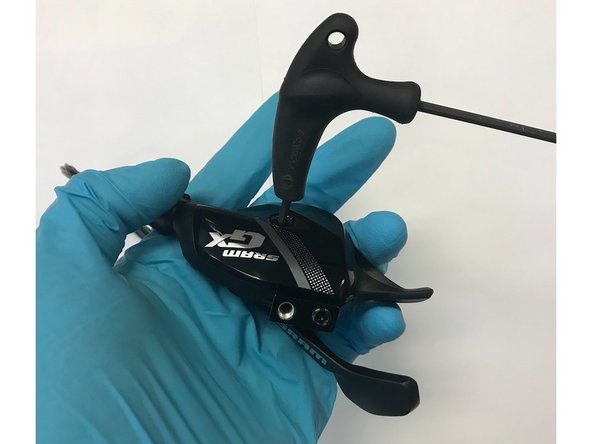
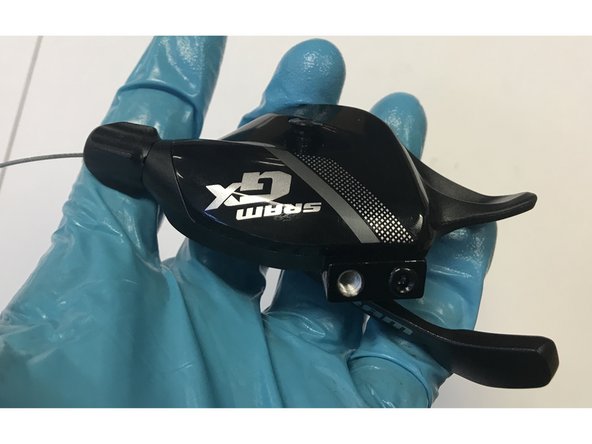
Using the 3mm hex key, remove the cap screw located in the center of the cap. Remove the cover from the shifter and set the parts aside.
-
Click the release lever to verify the shifter is in the hardest gear, then remove the old shift cable from the shifter.
-
For X1™ and GX™ shifters - Move on to next step.
-
For XO1™ shifters: Flip shifter over and remove the large shifter paddle using a 3mm hex key. Set parts aside for reinstall later.
-
To remove the paddle you will need to fully remove the screw since it is captured by the mount.
-
Push the cable out, remove from the shifter and recycle.
-
-
-
We will now remove the 11 speed spool & ratchet from the shifter.
-
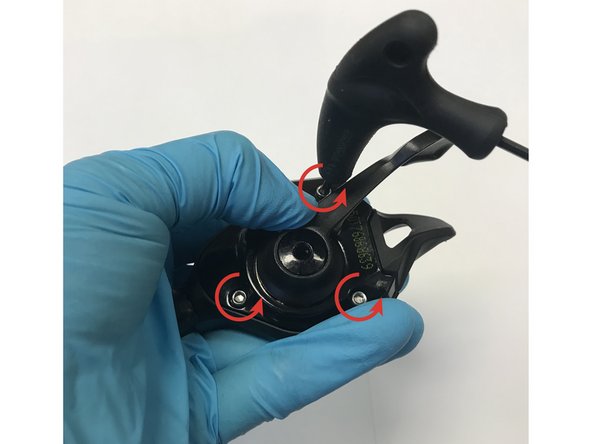
Note the three 2.5mm hex screw on the underside of the shifter. The orientation of these screws corresponds to the 3 prong shifter fixture "the claw".
-
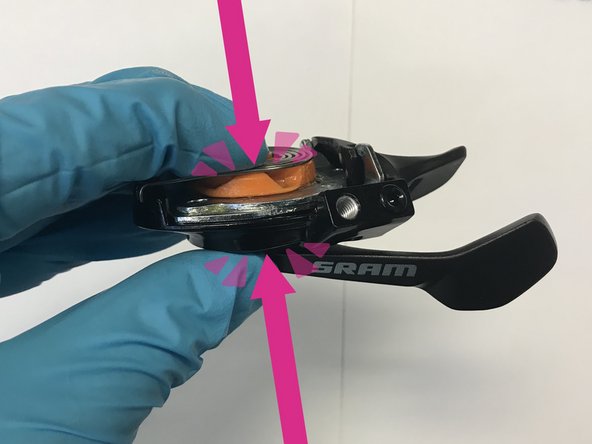
While holding the shifter body and assembly together with one hand, remove the three 2.5mm hex screws from the underside of the shifter. Set aside within easy reach.
-
Note that one of the three 2.5mm screws is shorter than the other two - this screw is located adjacent the barrel adjuster.
-
Remove the Black plastic inner cover from the top of the shifter assembly, exposing the spring and spool. Set the inner cover aside.
-
-
-
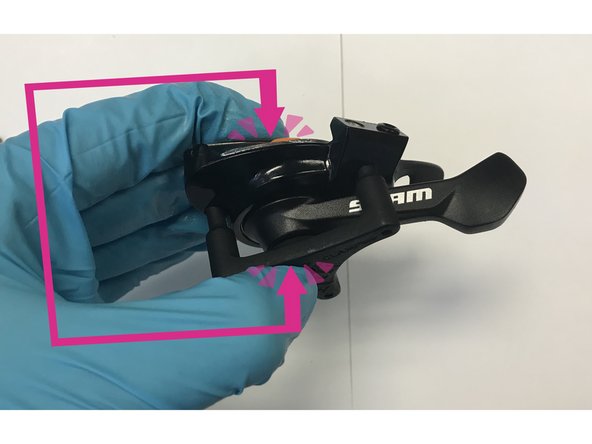
Flip over the shifter, and position the 3 prongs on the claw fixture into the recessed couterbores of the 3 screws you removed in the last step, while continuing to pinch the shifter assembly and body together.
-
You will need to slightly actuate the shifter lever on GX™ and X1™ units to move it out of the way of the claw.
-
From the top of the shifter, thread in the 3 screws you removed in the last step; entering the top of the shifter, thru the body and into the claw.
-
The body and assembly are now captured by the claw + screws and you can safely stop pinching the shifter and body together.
-
Remove the wound shifter spring by gently pulling up on the extended unwound portion and pulling it out from under the retaining tab.
-
-
-
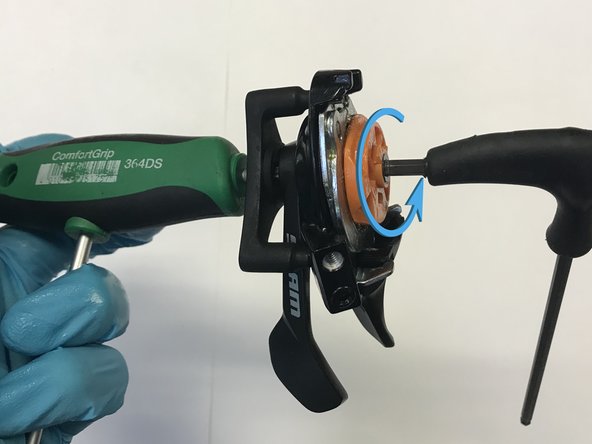
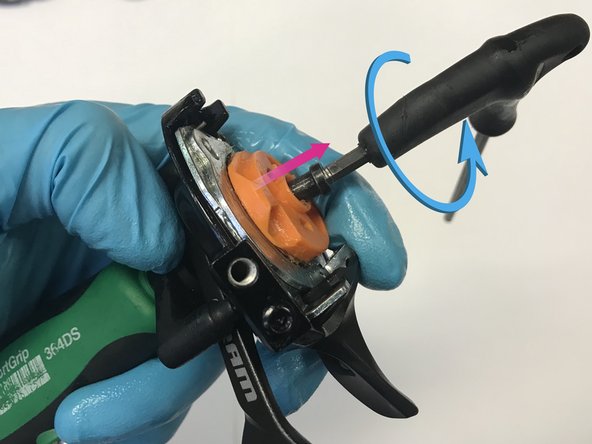
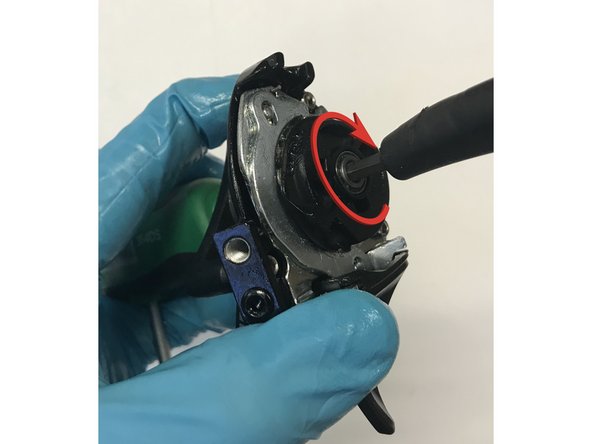
On the underside of the shifter, insert the T25 key thru the hole in the middle of the claw and into the T25 pivot bolt in the center of the bottom of the shifter. On the top of the shifter, insert the 4mm into the screw in the center of the spool. The shifter should now be captured between your 4mm hex and your T25 torx.
-
Hold the shifter/claw assembly and T25 tool stationary in your hand, then turn the 4mm hex counterclockwise to extract the spool and ratchet from the shifter. Remove the 4mm screw with the 11s spool assembly and set aside.
-
X1™ and XO1™ shifters will have a small washer under the spool. GX™ shifters do not have this washer. Remove the washer if present and set aside. When installing the 12s parts, you will use the washer included in your kit.
-
Visually note the locating hole in the spool and the pawl on the shifter assembly shown in the last image of this step.
-
-
-
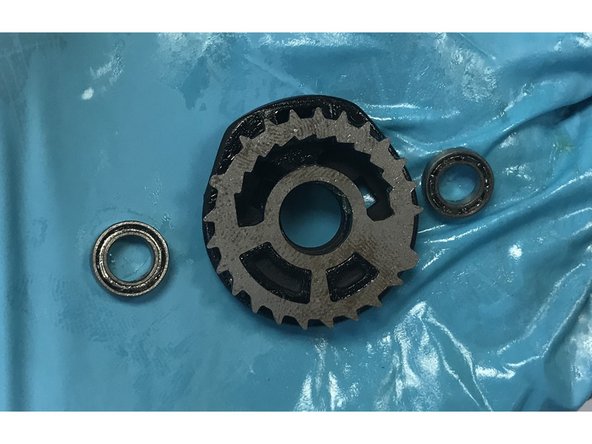
Identify the correct ratchet for your system. X1™/GX™/XO1™ ratchet has 1 dot mark, XX1™ ratchet has 2 dot marks.
-
Apply a light layer of grease to the new bearings, spool, ratchet, and washer (if necessary). Install the ratchet onto the spool by aligning holes on ratchet with matching section on spool.
-
There should be no clearance between the ratchet and spool - press firmly!
-
Insert the 4mm screw thru the bearing, spool & ratchet. For X1™/GX™/XO1™ next install the thin washer that came with your 12 speed kit.
-
-
-
Install the spool sssembly onto the shifter. Locate the spool as shown when you press it down onto the shifter. You should be able to see the lever pawl through the small window in the spool.
-
Ratchet should be clocked in the fully relaxed position so that the first tooth is located next to the ratchet release.
-
While holding the T25 torx key in the underside of the shifter pivot bolt, tighten the 4mm hex key to draw the new 12s spool & ratchet onto the shifter. Torque to 2nm or stop +30 degrees
-
Don't force the assembly together!
-
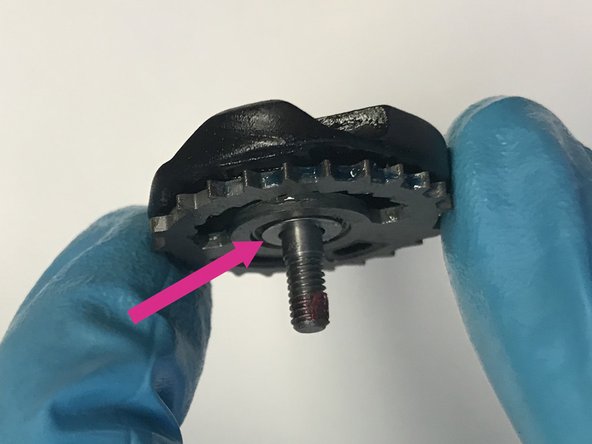
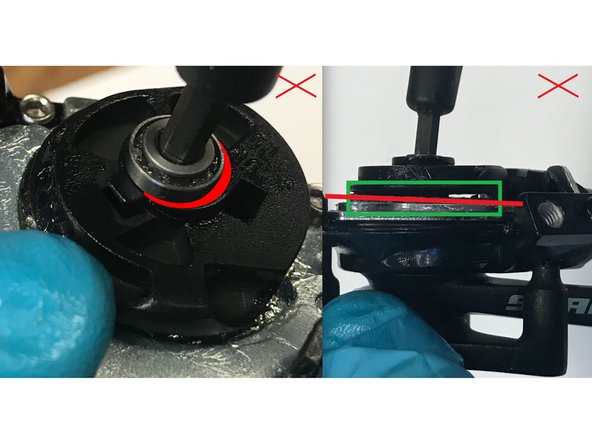
Make sure the ratchet is sitting flush with the surface of the shifter plate before completely tightening the assembly! See right side photo 3 in this step for incorrectly installed spool & ratchet!
-
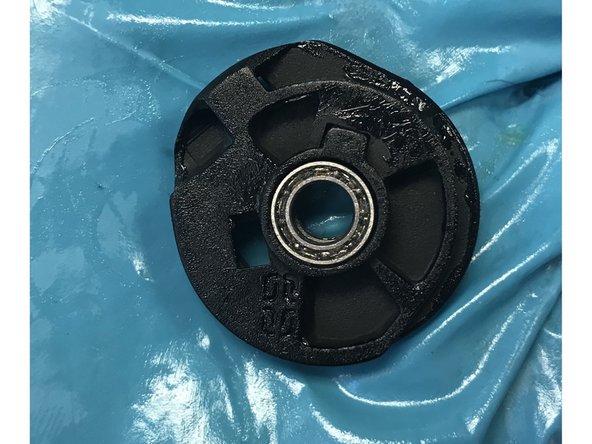
Make sure that upper bearing is fully seated in the spool as you tighten the 4mm! See left side of photo 3 in this step for bearing which is not fully seated.
-
-
-
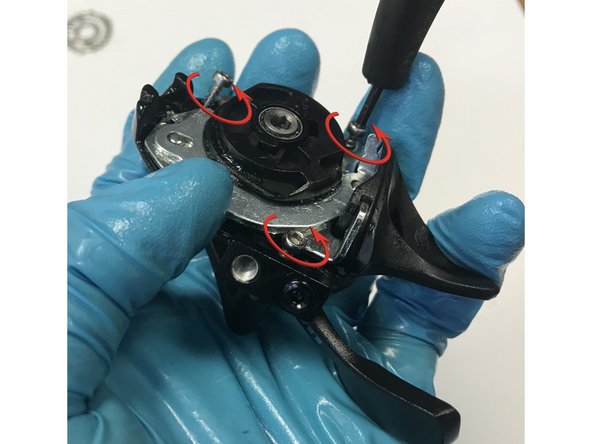
With the main pivot bolt securing the shifter, you can now remove the three 2.5mm hex screws holding the shifter together against the claw.
-
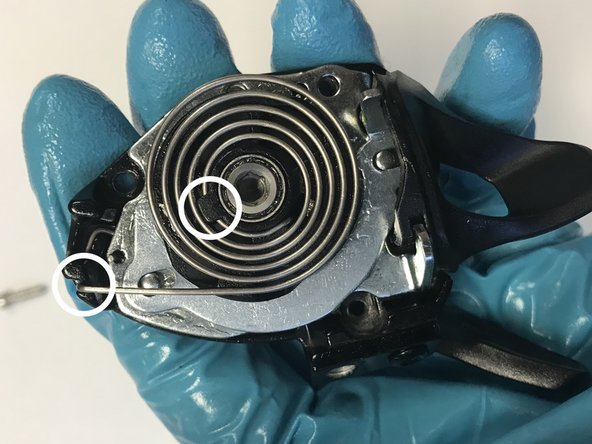
Reinstall the spring starting from the center: First locate the protruding tip of the inner coil into the corresponding hole on the spool. With the tip in place, gently pull the first inner coil over the retention tab.
-
Insert the tip of the unwound portion of the spring into the notch cast into the shifter body
-
Replace the inner cover with the barrel adjuster on the shifter.
-
Ensure that the unwound portion of the spring sits outboard of the small guide lip on the inner cover. See photo.
-
While holding inner cover in place, flip shifter over and reinstall the three 2.5mm hex screws into the bottom of the shifter. Torque to 1Nm or or 10 deg past snug.
-
Make sure you are replacing the correct length screws in the correct locations. The short screw belongs in the hole by the barrel adjuster.
-
-
-
If performing the upgrade on a XO1™ shifter, reinstall shifter paddle and 3mm hex screw which was removed in the first step. If you are working on an X1™ or GX™ skip to the next step.
-
Install the new shifter cable provided with the kit and give the larger thumb paddle a few clicks while watching the ratchet turn to ensure everything is functioning properly. Use the smaller paddle to click back down into the relaxed postion.
-
When shifting back down into the relaxed position for the ratchet, it may be necessary to gently pull the shifter cable while clicking the paddle. This mimics the tension provided by the derailleur spring and is normal.
-
When function is confirmed, reinstall outer shifter cover and now move forward with the cassette install, derailleur pulley spacer install or adjusting your derailleur if those steps have already been completed.
-


Thanks for reading, now get out there and ride!
SRAM™, SRAM EAGLE™, SRAM 1x™, XX1™, X01™, X1™, GX™ and NX™ are trademarks of SRAM LLC
Thanks for reading, now get out there and ride!
SRAM™, SRAM EAGLE™, SRAM 1x™, XX1™, X01™, X1™, GX™ and NX™ are trademarks of SRAM LLC