


Introduction
e*thirteen's Quick Fill Plasma Valves are new for 2022 and come in 5 different colors. They feature a removable carrier which allows simple and clean plasma sealant injection.
Tools
Parts
-
-
Remove the wheels from your bike. Remove tires and old valve or tube.
-
Check the tape: Verify the tape on the rim is intended for tubeless applications. Thoroughly inspect rim tape to ensure it is fully adhering to rim well and is the correct width - beadhook-to-beadhook. There should be no tears and the edges of the tape should not be pulling up at any location.
-
The majority of tubeless sealing issues stem from rim tape problems. If in doubt, install new tape.
-
Get it clean: Using rubbing alcohol (or a similar residue-free cleaner), clean sealant residue or any other debris from the tape in the rim well and at the bead hooks.
-
Remove Quick Fill Valves from packaging and remove the silver backing nuts.
-
-
-
Before installing, verify you have the correct length valves for your rim: There are 2 different length valves to fit most rims on the market. 16-24mm are most common. Deeper dish rims will require the longer 23-31mm valves.
-
Install the valve stem through the valve hole from the inside of the rim. Thread on the valve nut and note the correct orientation of the convex rubber seal (see image). To achieve proper sealing, the rubber seal should follow the the contour of the rim well. Correct seal orientation is critical.
-
Tighten the valve using your hands until the rubber seal compresses into the rim well and there is no gap between the rubber seal and rim well.
-
Do not use tools or pliers to tighten valves! They only need to be hand tight. Using tools can potentially over tighten the system and cause damage to the rim!
-
-
-
Install tire on rim, fully seating both beads.
-
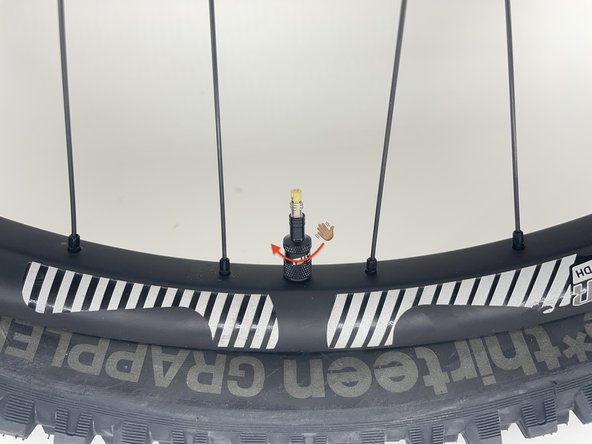
Remove valve stem carrier to access sealant port.
-
Using the e*thirteen Direct Inject Bottle, install e*thirteen Plasma sealant through the sealant port.
-
Reference the chart on the Direct Inject Bottle for appropriate sealant volumes relative to tire size.
-
Reinstall valve stem carrier.
-
-
-
Begin inflating your tire. Monitor that the tire beads are properly installed and fully seated. Inflate to 15-20 psi.
-
Carefully inspect the bead to ensure it is not slipping above the rim bead hook in any location.
-
Inflate your tire to the max PSI shown on the tire sidewall and go test ride your bike for 10-15 minutes to disperse and activate the sealant.
-
Reduce your PSI to your normal running pressures and you are ready to ride.
-
Tire pressure should be checked with a digital pressure gauge before every ride. It will be normal to lose pressure on a new tire over the first couple weeks as the sealant does it's job. The more you ride, the faster a nice sealing coat will develop on the inside of your tire.
-


Thanks for reading, now get out there and ride!
Thanks for reading, now get out there and ride!