


Parts
-
-
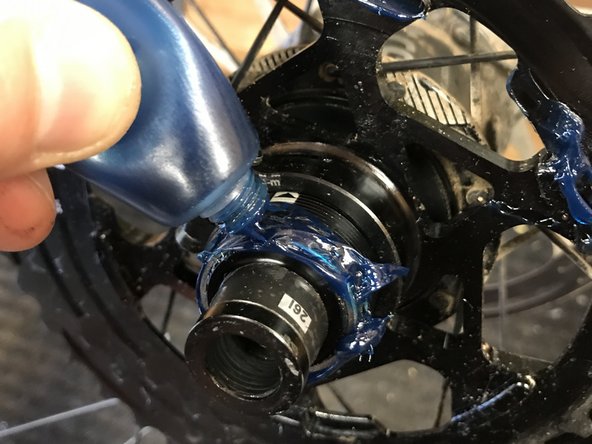
Lightly greasing the threads and splines of the XD™ driver.
-
Install the aluminum portion of the TRS cassette on the XD™ driver.
-
Ensure that the aluminum portion of the cassette carrier is pressed on the driver until the back surface of the cassette contacts the stop surface on the driver!
-
NOTE: Special step for Hope hubs!! - If you are installing a pinch-bolt cassette on a Hope XD™ driver, you will need a special shim available free of charge from us. Please go to Step 2 BEFORE torquing the pinch bolt.
-
Using a torque wrench with a T25 bit, tighten the pinch bolt on the collar of the aluminum carrier to 4Nm.
-
-
-
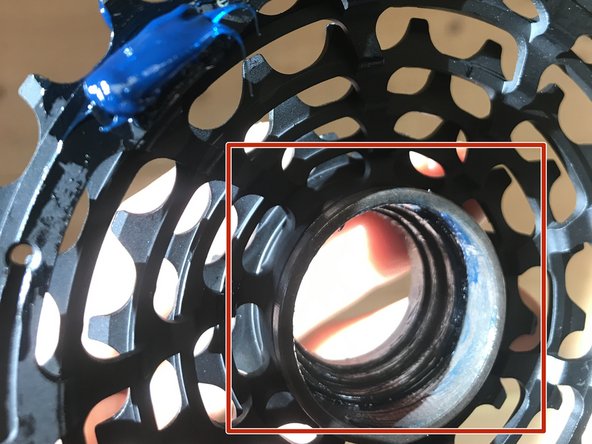
Hope XD™ drivers do not conform to the XD standard and require a shim for proper pinch-bolt cassette function. Shim is available free of charge from e*thirteen and it's distributors. Contact support@bythehive.com.
-
Note the recessed location on the freehub where the cassette clamps the body. This is where the shim will go.
-
Grease the splines and slide on the alloy piece as shown in step 1.
-
With the T25 bolt fully loose, slide the shim over the driver body and insert one shim edge in between the alloy cassette and the driver body. Then slowly work around the body pushing the shim into place until it is fully seated.
-
Using a T25 and a torque wrench, tighten the pinch bolt to 4Nm as shown in the final image of step 1.
-
-
-
Lightly grease the connecting prongs on the aluminum carrier.
-
Grease the end of the XD™ driver as well as the inner portion of the engineering bushing it will interface with.
-
**Do not remove the engineered plastic bushing. This piece is critical for proper cassette function**
-
-
-
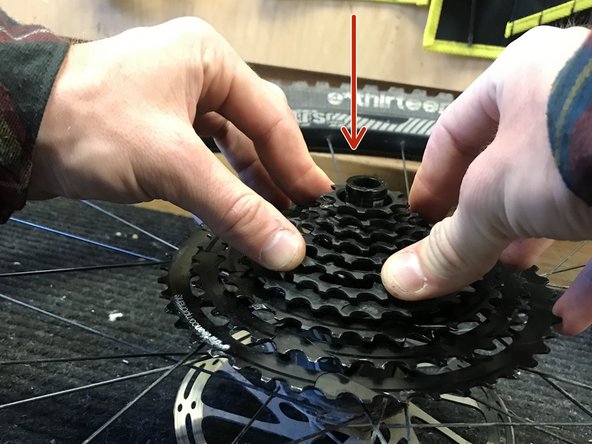
Align the arrow on the 28t cog of the steel portion with the unlocked logo on the 33t cog on the alloy portion. Push down firmly on the steel portion of the cassette to slide it down onto the XD™ driver. You may need to wiggle it slightly to get it to seat fully.
-
The steel portion of the cassette only installs in one position. Note the small tang on the steel piece needs to slide into the small clearance slot in the aluminum piece.
-
Make sure the largest steel sprocket (28T) is sitting flush against the aluminum piece.
-
-
-
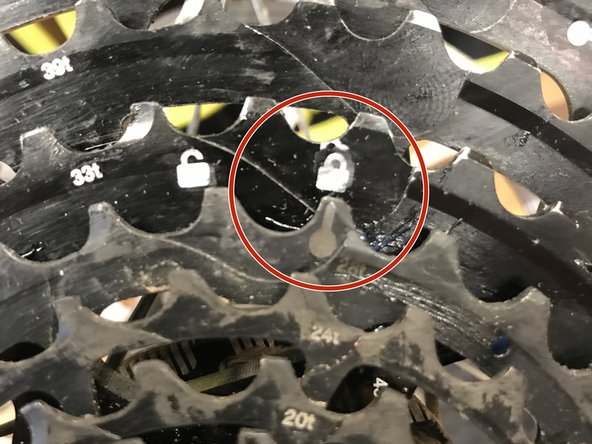
Using a chainwhip, turn the steel sprocket assembly clockwise to lock it in place.
-
Line the key on the steel sprocket assembly up with the lock arrow on the aluminum cogs to ensure the two pieces are fully locked together.
-


Thanks for reading, now get out there and ride!
Thanks for reading, now get out there and ride!