


Introduction
This guide shoes how to install and remove 2019/2020 TRS and LG1 self extractor cranks.
Parts
-
-
For removal instructions please jump to step 6 of this guide
-
Install the bottom bracket (BB) into your frame by following the instructions found on our support site or that came with your BB.
-
-
-
Before installing the arm turn the out ring of the APS adjuster such that the adjuster is in its flattest position. Keep APS fully seated against crank arm.
-
**You do not want the APS adjusted so that there are any threads showing**
-
**Ensure the APS stays fully seated against the arm during the install process. Failure to monitor this could result in damaged keyways, spacing issues and a non-functional APS.**
-
-
-
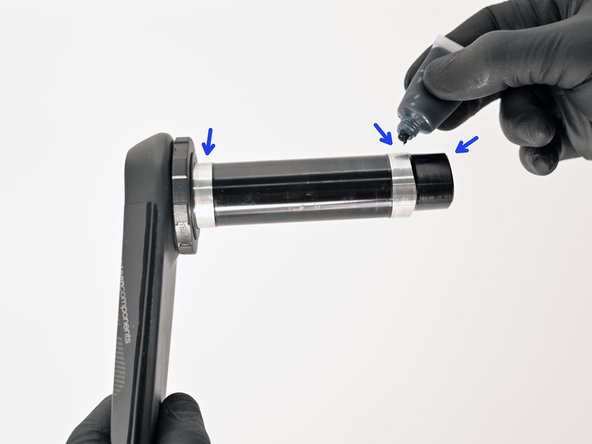
Grease the spindle and P3 interface
-
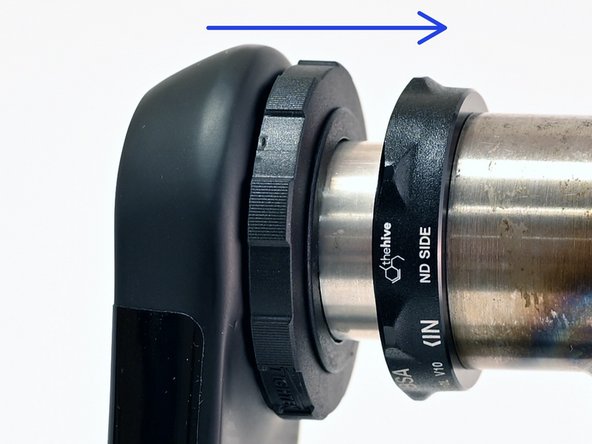
Slide the non-driveside arm and spindle assembly through the BB and ensure it is fully seated. Do not use a hammer as this may damage the bearings
-
Inspect the APS adjuster to ensure that it is fully seated on the arm.
-
Test the APS function by rotating the outer ring in the "on" direction and ensure the inner preloader is moving towards the BB. Turn the outer ring in the off direction and ensure the APS is fully retracted before moving onto the next step.
-
-
-
Reference our chainring install instructions if you have not yet installed your ring on the driveside arm.
-
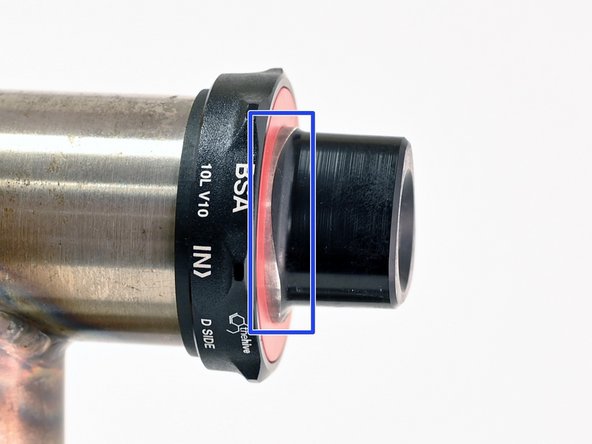
You should see 100% of the P3 interface protruding from the driveside of the BB plus 1-1.5mm of machined surface.
-
If a portion of the P3 interface is under the bearing, recheck that the non-drive side is fully seated. If so, the BB may have been installed improperly - possibly with too many spacers. Stop install, and recheck that the BB was installed with the correct spacer configuration before proceeding.
-
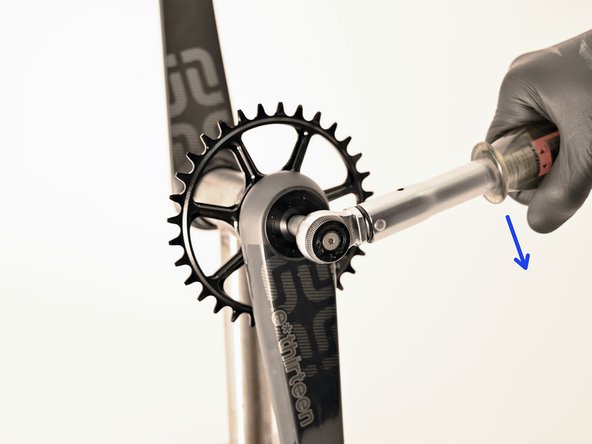
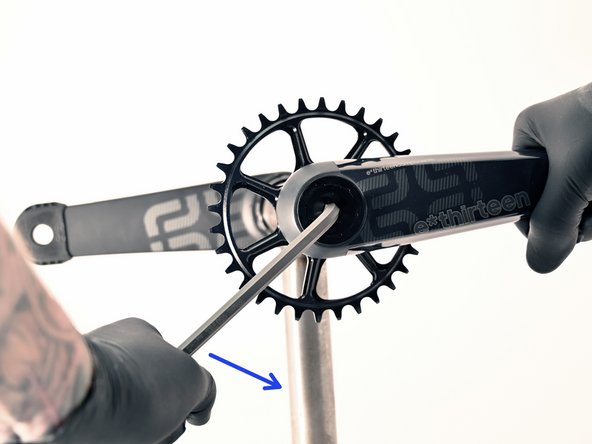
Install the drive side crank arm onto the P3 interface using an 8mm hex key.
-
-
-
Using a torque wrench, tighten the crank bolt to 40Nm
-
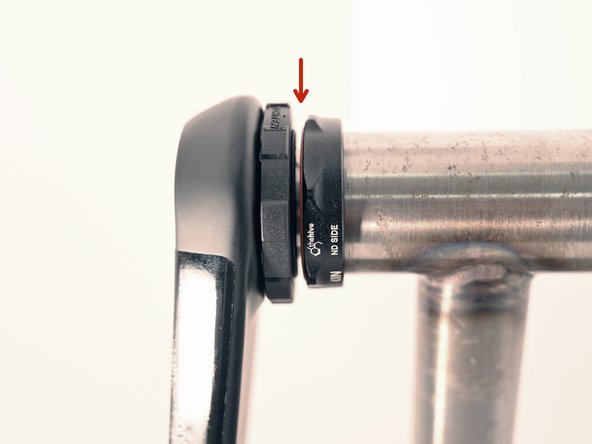
There should be a 1-2mm gap between the APS adjuster and bottom bracket.
-
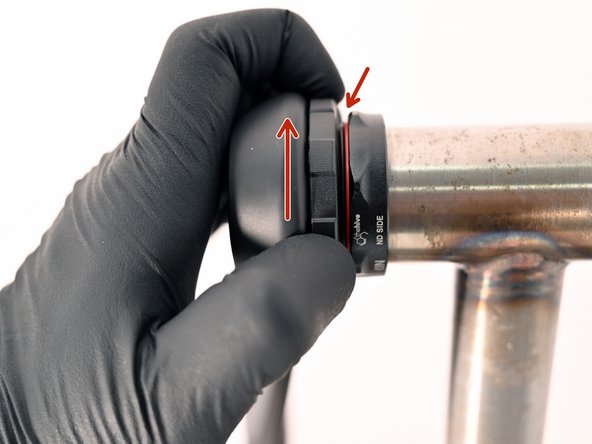
Activate the bearing preload by turning the APS adjuster counter-clockwise
-
Note how the inner portion of the adjuster moves and closes the gap between the adjuster and the bearing
-
Hand tighten the APS adjuster until no side to side play is felt in the spindle
-
This can be double checked by squeezing the non-drive arm against the bikes chainstay.
-
-
-
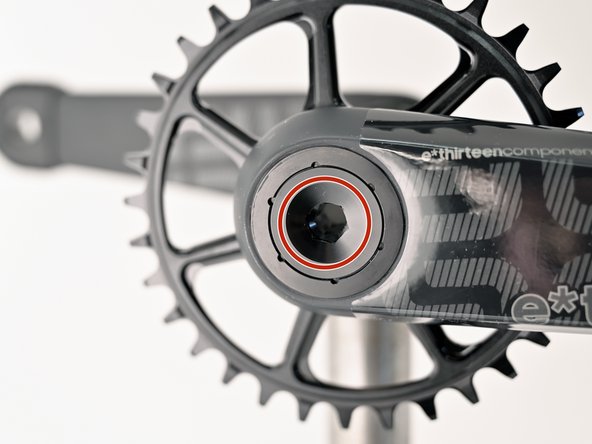
These are self extracting cranks. The 10mm hex interface should not be tampered with.
-
The crank is press fit onto the spindle using 40-48 Nm force. This means that considerable force will need to be used when loosening the bolt of the self-extracting system. This is normal.
-
Using the 8mm hex key turn counter-clockwise until the bolt is fully loose.
-
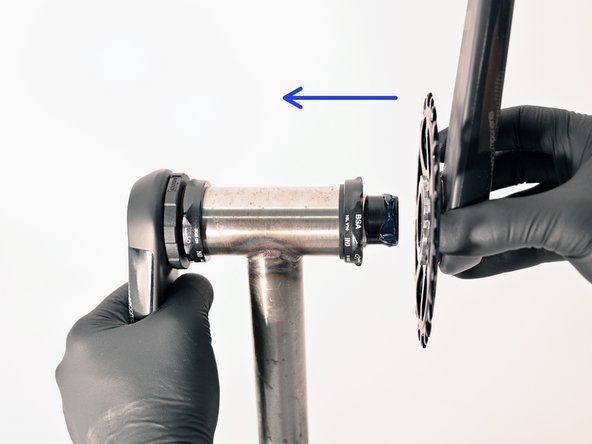
Once the 8mm hex bolt is fully loose the drive side crank arm can be removed.
-
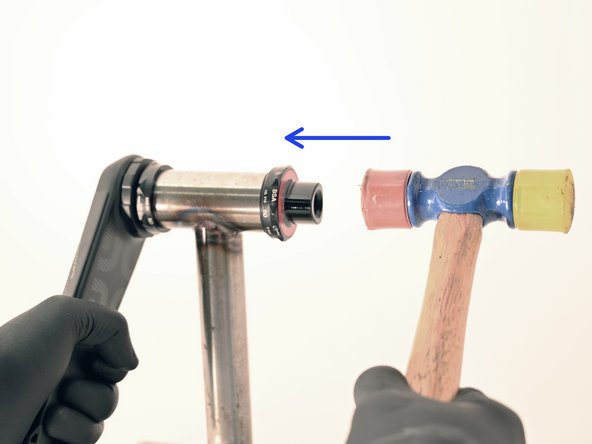
To remove the non-drive side crank arm you may need to lightly tap the spindle with a rubber mallet.
-


Thanks for reading, now get out there and ride!
Thanks for reading, now get out there and ride!