


Introduction
This guide will instruct on the installation process for e*thirteen Helix direct mount chainrings onto Helix Cranks
Tools
Parts
-
-
Lay out parts on a clean workbench workbench.
-
If installing ring on a used crank, ensure direct mount interface splines are clean.
-
-
-
Identify the chainline requirements of your bike. Helix rings are flip-flop and can achieve either 53mm (Boost) or 56mm (Super Boost) by turning the ring over.
-
Ensure splines are clean and add a very light layer of grease to the spline interface on the chainring.
-
Slide the ring onto the direct mount splines with the chainline size you need facing outward and the arrow showing "Pedal" aligned with the crank arm access.
-
Thread on the silver chainring lockring by hand until it bottoms out on the chainring.
-
-
-
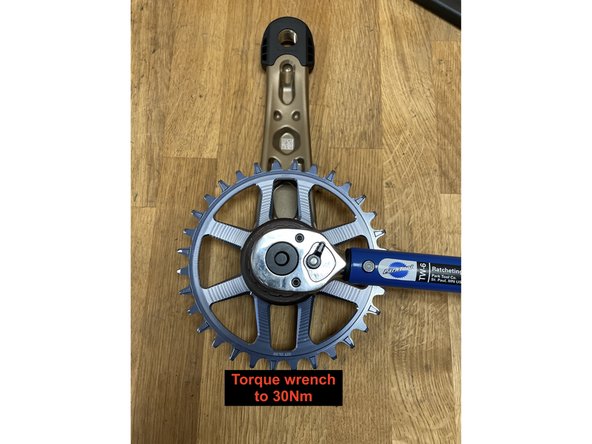
The chainring lockring will need to be tightened to 30Nm of torque.
-
The preferred method to achieve correct torque spec is to use a torque wrench.
-
The e*thirteen chainring lockring tool which is provided with the cranks has 2 interfaces which can be used - 36mm flats for a crowsfoot attachment or Shimano FC-32 Tool Spline interface.
-
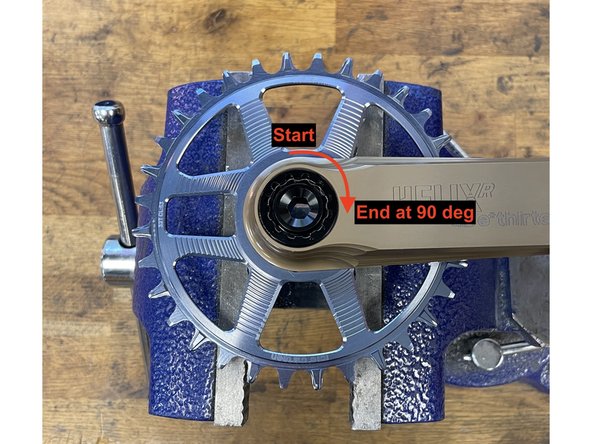
If a torque wrench is not available proper torque can also be achieved by turning the lockring 90 Degrees from it's hand tight snug position.
-
If using the snug +90 degree method, the easiest way to achieve this is to put the chainring lockring tool in a vice. Alternatively a large crescent wrench can also be used.
-
-
-
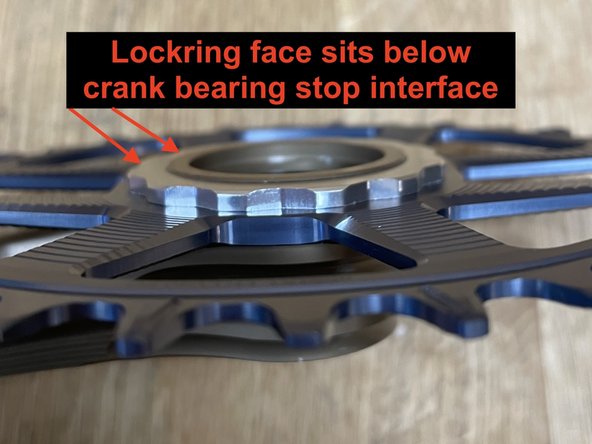
Ensure that the lockring is sitting below the cranks flange that interfaces with the BB.
-
Reinstall crankset on bike and time for a ride!
-


Thanks for reading, now get out there and ride!
Thanks for reading, now get out there and ride!