


Introduction
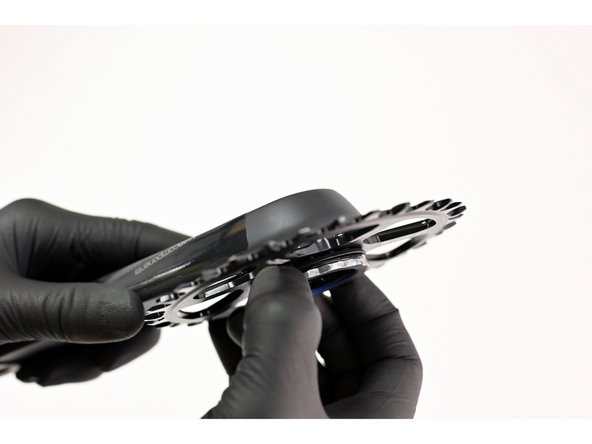
This guide shows how to install a SL, UL or Helix chainring on a crankset which has adjustable chainline via spacers which sit on either side of the chainring. This includes TRS and LG1 Cranks. XCX cranks do not have adjustable chainline and therefore do not include chainline spacers
Tools
Parts
-
-
Start with identifying what chainring you have. This guide will cover the install of e*thirteen SL rings (-8mm offset), e*thirteen UL rings (-5mm offset) and Helix chainrings which are reversable and provide either -3mm or -5mm offset
-
For SL rings go to step 2 of this guide. SL rings are -8mm and on 73mm spindle cranks, will work with non-boost 49mm chainline on 135/142mm bikes and "boost" 52mm chainline on 148mm bikes. When paired with 83mm LG1 DH cranks will provide 56mm chainline on 150/157mm bikes.
-
For UL rings go to step 3 of this guide. UL rings are -5mm will work with 148x12 (Boost) bikes to achieve a 52mm chainline.
-
For Helix Rings go to step 4 of this guide. Helix rings are reversible to achieve a -3mm or -5mm offset and achieve either a 52.5 "boost" chainline or a 55.5 "SuperBoost" chalinline
-
The configurations shown in this guide are for industry standard chainline numbers for non-boost, boost and superboost. Our adjustable chainline spacer system allows the rider to dial in the actual chainline to optimize it for your specific bike and use case.
-
-
-
All TRS and LG1 cranks are supplied with 3mm worth of chainline spacers. This could be 3x 1mm spacers or 1x 1mm & 1x 2mm.
-
73mm spindle crank with Non-Boost 49mm Chainline: See image 1
-
73mm spindle crank with Boost 52mm Chainline: See image 2
-
83mm spindle DH crank with 56mm Chainline: See image 3
-
-
-
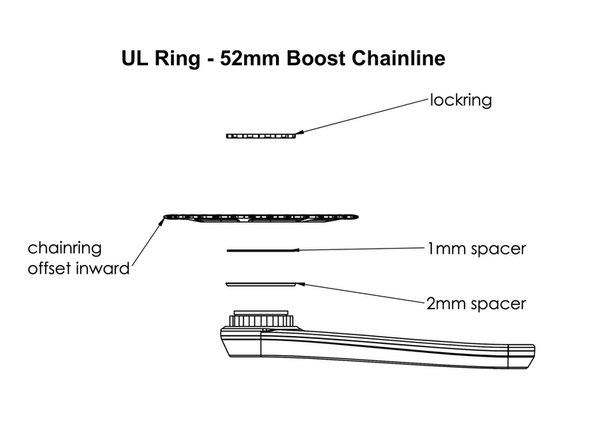
UL rings are -5mm offset and originally intended for XCX crank applications; they can however be used on 73mm spindle TRS/LG1 cranks to achieve a 52mm "Boost" chainline
-
52mm Boost Chainline: See Image 1
-
-
-
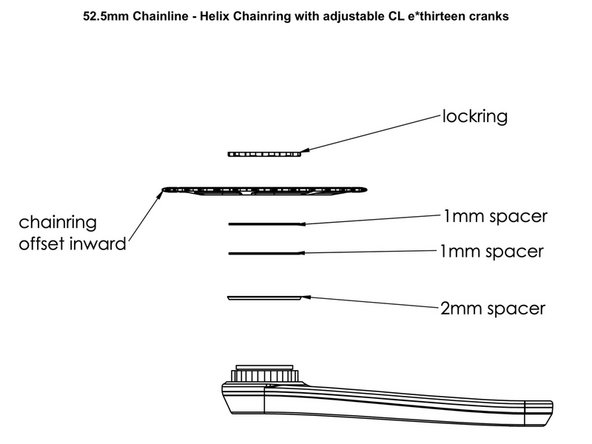
Helix chainrings are 1mm thinner at the crank mounting location than UL or SL rings. A 1mm spacer is supplied with all Helix chainrings to account for this difference when a Helix ring is installed on a TRS/LG1 crank with adjustable chainline. This spacer MUST be used in addition to the 3mm worth of spacers already found on the crank.
-
Helix Ring - Boost 52.5mm Chainline: See image #1
-
Helix ring - SuperBoost 55.5mm Chainline: See image #2
-
-
-
If setting up a configuration where the lockring is tightening against a spacer, ensure that the spacers are sitting fully in the grooves of the mounting location so the lockring is fully compressing the system.
-
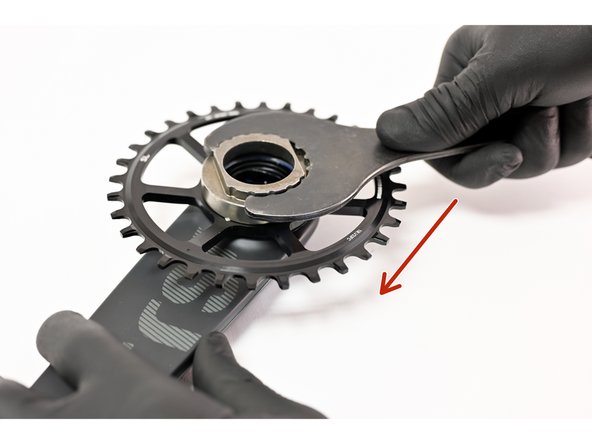
Thread on lockring with spacers in correct location for chainring offset and rear hub spacing
-
Tighten lockring to 30Nm (Snug + 90 degrees)
-


Thanks for reading, now get out there and ride!
Thanks for reading, now get out there and ride!