


Tools
Parts
-
-
Start by lightly greasing the threads and splines of the XD driver.
-
Install the aluminum cassette piece on the XD driver.
-
Be sure to install in the correct orientation with the large spline on the aluminum piece matching the large gap in the freehub body.
-
Install the cassette lockring by hand, turning clockwise.
-
-
-
Using an e*thirteen Bottom Bracket (BB) tool, tighten the lockring to 25N*m, or snug + 45 degrees.
-
The cassette lockring tool is the same tool used for e*thirteen bottom brackets.
-
-
-
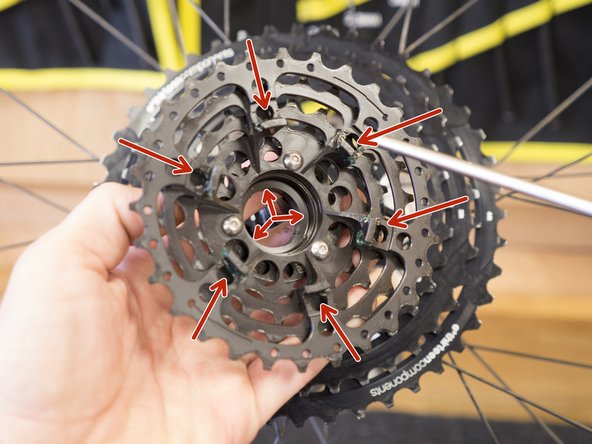
Grease the tangs of the steel sprocket assembly and the inner diameter of the 9-14t cogs before installing. Don't be shy, apply liberally!
-
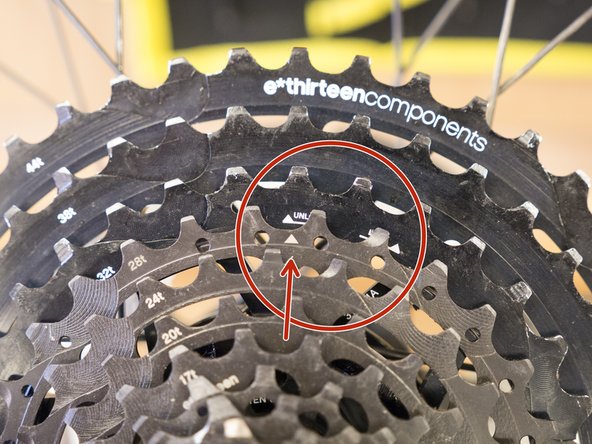
Install the steel sprocket assembly onto the aluminum piece by lining up the key on the steel cog with the unlock arrow on the aluminum cogs, then sliding the steel assembly over the XD driver.
-
Push down firmly on the steel portion of the cassette to slide it down onto the XD driver. You may need to wiggle it slightly to get it to seat fully.
-
The steel portion of the cassette only installs in one position. Note the small tang on the steel piece needs to slide into the small clearance slot in the aluminum piece.
-
Make sure the largest steel sprocket (28T) is sitting flush against the aluminum piece.
-
-
-
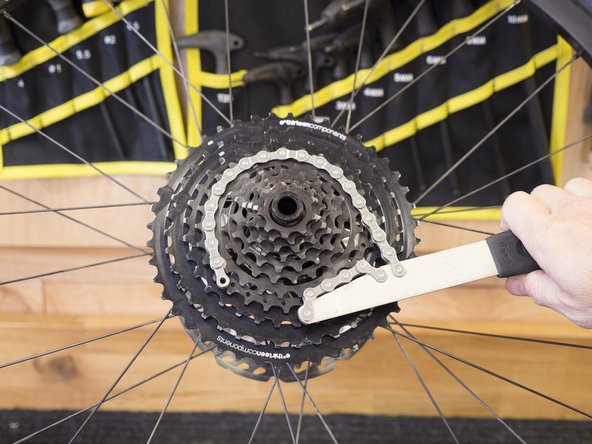
Using a chainwhip, turn the steel sprocket assembly clockwise to lock it in place.
-
Line the key on the steel sprocket assembly up with the lock arrow on the aluminum cogs to ensure the two pieces are fully locked together.
-
Please note: 11sp chains are recommend for both the 10 and 11sp version of the cassette
-


Thanks for reading, now get out there and ride!
Thanks for reading, now get out there and ride!